


Migrating a Windows operating system to a new drive without reinstalling can be a hassle. There used to be software that could do this migration, but now they are all paid. This process is called “cloning”. You cannot just copy and paste the files to a new disk and expect Windows to boot from it, for a variety of reasons, primary among them being the other partitions that Windows needs on a disk to operate, such as one partition for the boot manager itself.
In this piece, I am going to talk about how you migrate a working installation of a Windows 10 or Windows 11 operating system to a completely new disk. This applies to those wishing to move a Windows installation from an HDD to an SSD – which seems to be the most common reason for doing the migration.
We will be using a software called Macrium Reflect 7 to do this.
This is Spearblade’s Windows migration guide for Windows 10 and 11. It works for cloning a working Windows OS from any disk to any disk, regardless of its type and size.
First steps
Let’s get the basics out of the way first of all.
Understanding disk lingo
- A disk is the hardware like an HDD or an SSD that you connect to your motherboard. Disk numbers in the operating system start with 0, much like GPU numbering. So, the first disk you have is Disk 0 and the second one is Disk 1, and so on. The current installation of Windows is on Disk 0.
- Note that once the migration is done using the following process, the drive letter of the partition or the disk that has it will change to C: from whatever it was before (as compared to before migration, when C: is likely your current Windows partition on your HDD).
- The disk is the hardware. A disk can be segmented into multiple partitions, which are generally called “drives” in Windows. Each drive is just a different partition within the same disk. Each drive is usually denoted by a drive letter.
Installing the hardware
Make sure that the SSD is installed and being shown as a separate drive in My PC. If this isn’t happening then you first need to troubleshoot that. Make sure you have installed it at the right place and that drivers are updated.
Space considerations
It helps if the new partition or disk you are going to use is remarkably larger than the current C: partition on your HDD. That being said, you won’t face any problems as long as your new space is larger than the used space of the current C: drive. Needless to say, if the target partition or disk is smaller than the current used space in your HDD’s C: drive, the cloning will not be successful. In this case, you need to reduce the total amount of space used such that it becomes lower than the target partition or disk.
Also, I am sure you have been recommended to keep some free space in the Windows partition. This is recommended for good reason, though theoretically, you can have a running OS with just 1 GB of free space. So, make sure that there is plenty of free space on the target disk or partition.
Step 1: Installing cloning software
We’re all set now. It’s time to begin the migration.
Please disconnect any additional disks you have that will not be used (everything except the old HDD from which you will migrate Windows and the new SSD to which you will migrate it).
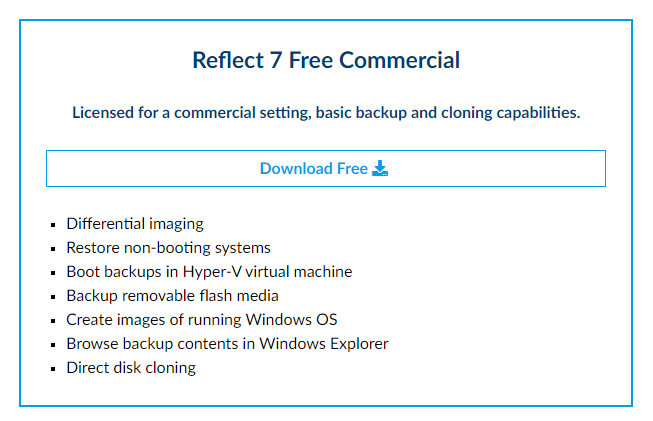
- Download Macrium Reflect or Samsung Data Migration software if you have a Samsung SSD. Macrium works in both cases, so we’ll use that one.
- Choose the Reflect 7 Free Commercial license and install it.
- Launch Macrium Reflect 7 and make sure it’s showing both the disks.
Step 2: Starting the cloning
Select all the partitions related to the C: drive. This includes partitions such as the recovery partition (450 MB) and the EFI system partition (99 MB). There will be a third partition of 521 MB, you can skip that.
All partitions are numbered, so here on we will be indicating them with their numbers to avoid any confusion. The first five partitions (most likely) are the C: drive-related partitions. Alternatively, just see which ones are not the partitions that show up on My PC. My PC has three partitions on my HDD, let’s say. These are the C: drive and a D: drive and an E: drive. Everything except D: and E: in this case should be selected.
Now click on the “Clone this disk…” option. Make sure all the C: drive-related partitions are ticked. In most cases, this means selecting partitions 1 through 5, with the 4th one being the actual C: drive. If you are unsure, then select all except the other drives that you recognize, such as D:, E:, etc.
Click on the bottom section that reads “Select a disk to clone to”. This will show a dropdown of your other disks. As you only have one more disk connected, choose that one.
Click on Next and follow the steps until you click Finish.
Hopefully, this should be all you need. The process can take a while. Once done, you will have moved your Windows into the target drive.
Skip to the last section if cloning is successful.
Insufficient space when trying to clone
Cloning will not always be successful. Sometimes, you will get stuck at a particular percentage with an error code. Yet other times, you might get an insufficient space warning.
A common problem is that one of the partitions will just not carry over to the second disk and will give an insufficient space warning even though there is clearly more space available. This could be any partition. You can try once skipping the 521 MB partition (which doesn’t need to be cloned anyway). But the problem can still persist, even if you shrink the partitions that are getting copied over to make space for the one/ones throwing the space error.
These can be issues related to the health of the HDD. Older HDDs that have been in use for a while often get bad or unstable sectors.
Thankfully, if your disk is working properly, it’s likely that fixing these errors is going to be easy.
We’ll have a look at a pretty straightforward and non-technical way to solve sector problems.
Look for an error like this:
Clone failed – Error 0 – Read failed – 23 – Data error (cyclic redundancy check).-m_pSegmentToRestore->m_FileSystem.ReadFile- WriteFilemSystemData failed- pDataRun == NULL – RemapMFTRecord failed
If this is what you are getting then the HDD cannot be properly read. Even if you are getting another error related to space issues then here’s how you fix it:
- Install HDTune. It’s a nifty and lightweight tool to monitor HDD sector health.
- Launch HDTune and go to the “Health” tab.
- Look for any errors (there will be a status column for each item – items with a warning in their status are problematic).
- If you are getting a warning in any of these then you need to fix those.
Fixing each error is different. Some cannot be fixed because they mean permanent damage or something that needs a full wipe to be fixed. If that’s the case then sadly, you will need to go the complete reinstall route on your new SSD (disconnect the HDD but keep the SSD connected and install a fresh copy of Windows from a stick) and manually install everything back.
However, some errors are pretty easy to fix. For example, one of the items that have a quick fix is “current pending sectors”. Pending sectors are still a problem and technicians will recommend getting a new disk but as long as these are low in count, the situation is likely under control.
Victoria can help you fix a number of such errors so that your HDD partitions are ready to be cloned.
- Install Victoria (the page is in Russian, you will need to translate) or use MHDD (which is slightly more complex).
- Run Victoria and choose your drive.
- Go to the Test and Repair section.
- Make sure Read Mode is toggled and Remap on Error is toggled as well.
- Run Scan.
Once Victoria is done, it will fix the most common issues that plague older HDDs that are operating like normal.
Now, try the whole cloning process once more and you should be good to go!
Next steps
Once the cloning process is successful, you should try booting from your SSD a few times. This can be done by physically disconnecting the HDD but not doing that is also just fine.
- Restart your PC.
- Enter BIOS.
- Go to boot and set boot priority #1 to the SSD’s boot manager.
- Exit BIOS and reboot.
I highly recommend manually disconnecting the older HDD and booting just with the SSD a few times before you connect it back. It can help you avoid a few specific problems that are probable later on.
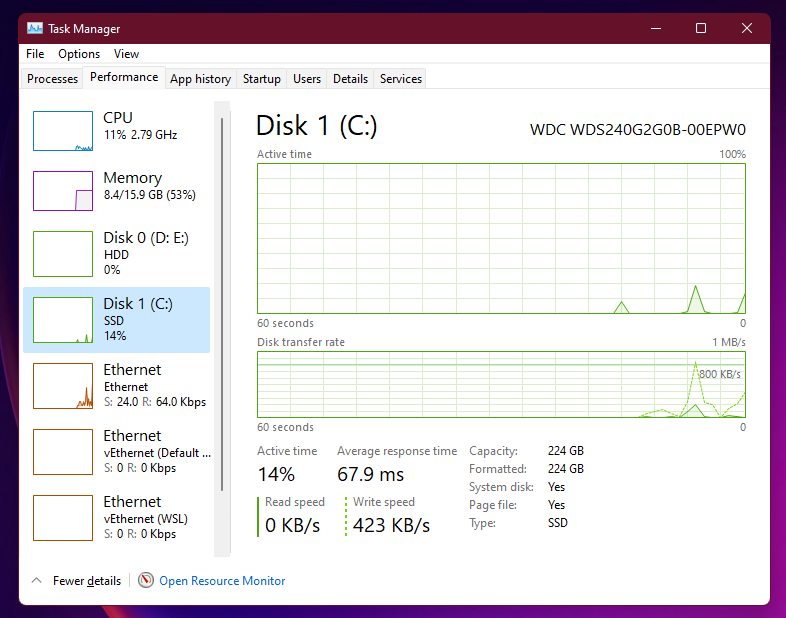
The first boot can be slow. Once Windows boots up, go to Task Manager (Ctrl + Shift + Esc on Windows 11, which doesn’t yet have a taskbar context menu to pull up the Task Manager) > Performance and see which disk is being used. If it’s Disk 1 (meaning the second disk, your SSD) then all is good.
Now, the last step is to recover the older drive’s space.
Go to partition manager (open search, type Disk Management, and open the app) and delete the older C: drive once you are sure that the new Windows is working properly. The deleted space will become unallocated space (marked with black) and now you can either create a new simple volume out of it (a new drive) or extend a previous drive using this space.
Now for the partitions. The C: drive can be formatted but the partitions (recovery and EFI system partitions) cannot be deleted from Disk Management. We need to use DiskPart for that.
- Open Command Prompt.
- Type diskpart and hit Enter.
- Type list disk and hit Enter.
- Choose the disk in question by typing select disk # (most likely to be disk 0, so the command becomes: select disk 0).
- Type list partition and hit Enter.
- You will see a number of partitions. Compare these sizes with the ones in Disk Management (most probably, the 450 MB, 99 MB, and 521 MB partitions are what we intend to delete).
- Type select partition # (where # is the partition number you wish to delete) and hit Enter.
- Type delete partition override and hit Enter.
- You will not have space visible in Disk Management. Use it any which way you like.
If the disk is dynamic then the above operation will fail. Additionally, you will also be unable to use the unallocated space that you recovered by deleting the C: drive on the HDD. In this case, your best bet is to move the data (your other drives apart from the older C: drive) to a backup like another disk or an external hard disk, clean/wipe it, convert it to a basic disk, and recreate those partitions entirely before transferring the data back in.
And that’s it! Migrating a working Windows installation from an older HDD to a new SSD can be hassle-free for many but a pain for many others. Hope I have helped you in some way, and if not, feel free to drop a query to Spearblade!

I just migrated my Windows 10/11 to a new SSD and it was a breeze! Thanks for the great guide!