Incorrect, multiple, or malfunctioning drivers can break your gaming experience. Whenever you are reinstalling a GPU or installing a new one, it helps to clean-uninstall all drivers, and then do the hardware process. Once you’ve installed the graphics card, just reinstall the drivers. Here’s a comprehensive checklist you can follow:
1. Clean Uninstall All Graphics Drivers
Download and install the free software called Display Driver Uninstaller or DDU. It’s well-known to perform a clean uninstall and is more comprehensive than uninstalling drivers using Windows or Nvidia/AMD’s third-party apps. No need to do anything in your apps.
- Go to the DDU page and download the software.
- Install DDU on your device.
- Follow the instructions to uninstall all graphics drivers.
- If a third-party app is left, like GeForce Experience or AMD Software, manually uninstall it from Windows.
- You might experience graphics artifacts like incorrect resolutions. Don’t worry and shut down the PC.
2. Install the Graphics Card
Now, it’s time to remove your graphics and reinstall it (or install a new one). If you’re not familiar with the process, it might help to check a video online first before you attempt. Generally, the GPU is held in place by a mounting bracket that’s screwed from outside the case. You might need to unscrew that before you open the case.
Make sure the power is turned off and the PC is disconnected from the wall socket. After disconnecting it, keep the power button pressed for 10 seconds to free up any loose charge in the board. You can also just wait out 20-30 seconds for it to happen automatically. You might also want to use an antistatic wrist wrap connected to a grounded object to discharge static electricity.
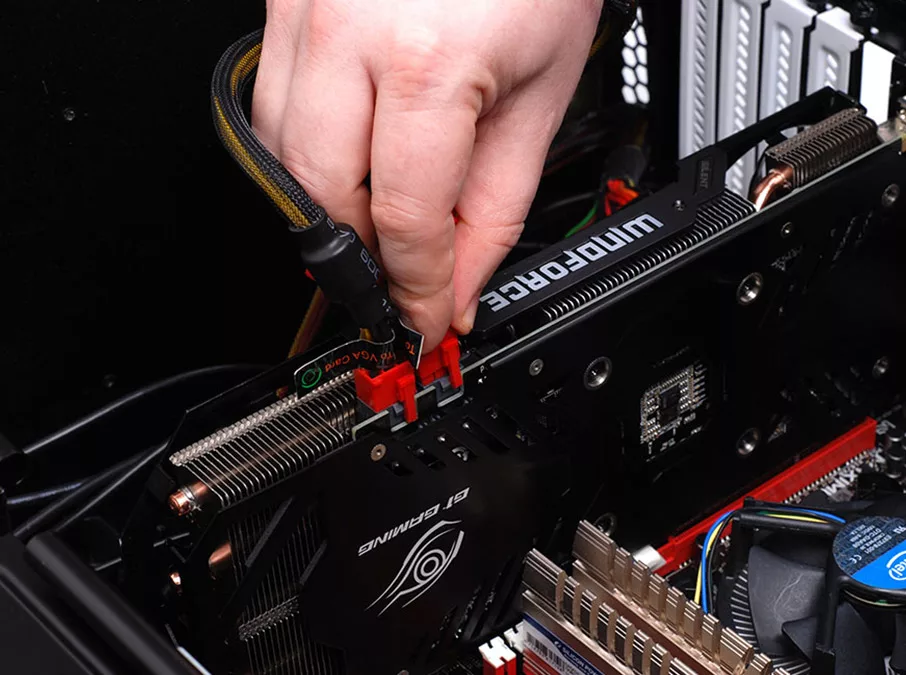
Once the GPU is unscrewed from the back, open the case. Here, gently remove the power connection to the GPU. There will be a small flap you need to press in order to unlock it for removal. This cable is coming out of the power supply and connecting to your GPU.
Lower-end graphics cards such as the GTX 790 don’t have an additional power cord as the motherboard can power them sufficiently. But anything from the 10-series or the AMD 500 series onward will most likely have a power connector.
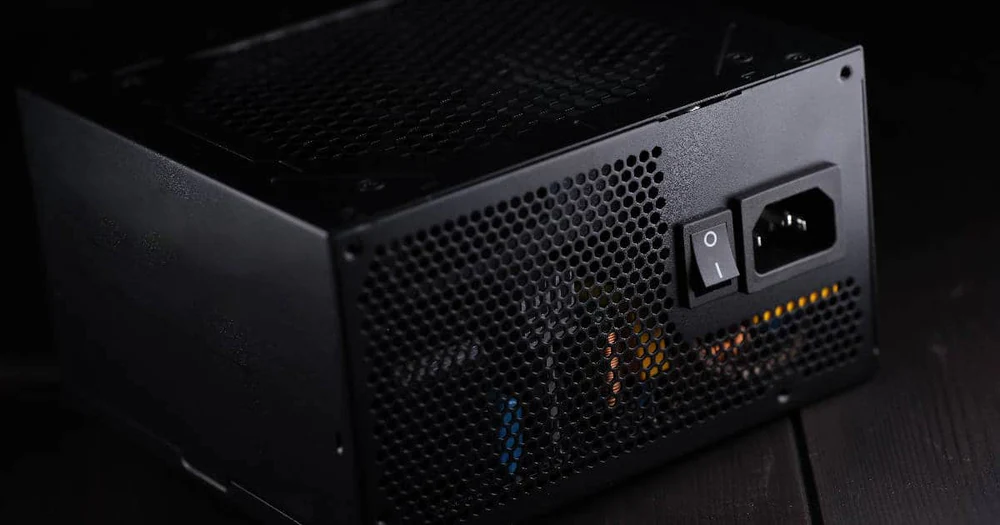
While we’re on the topic, you also need to make sure that the PSU is rated to supply enough juice to your new GPU if you’re upgrading. For example, a 550W PSU might have been enough to power your GTX 1660, but it won’t be enough to power an RTX 3070, for example.
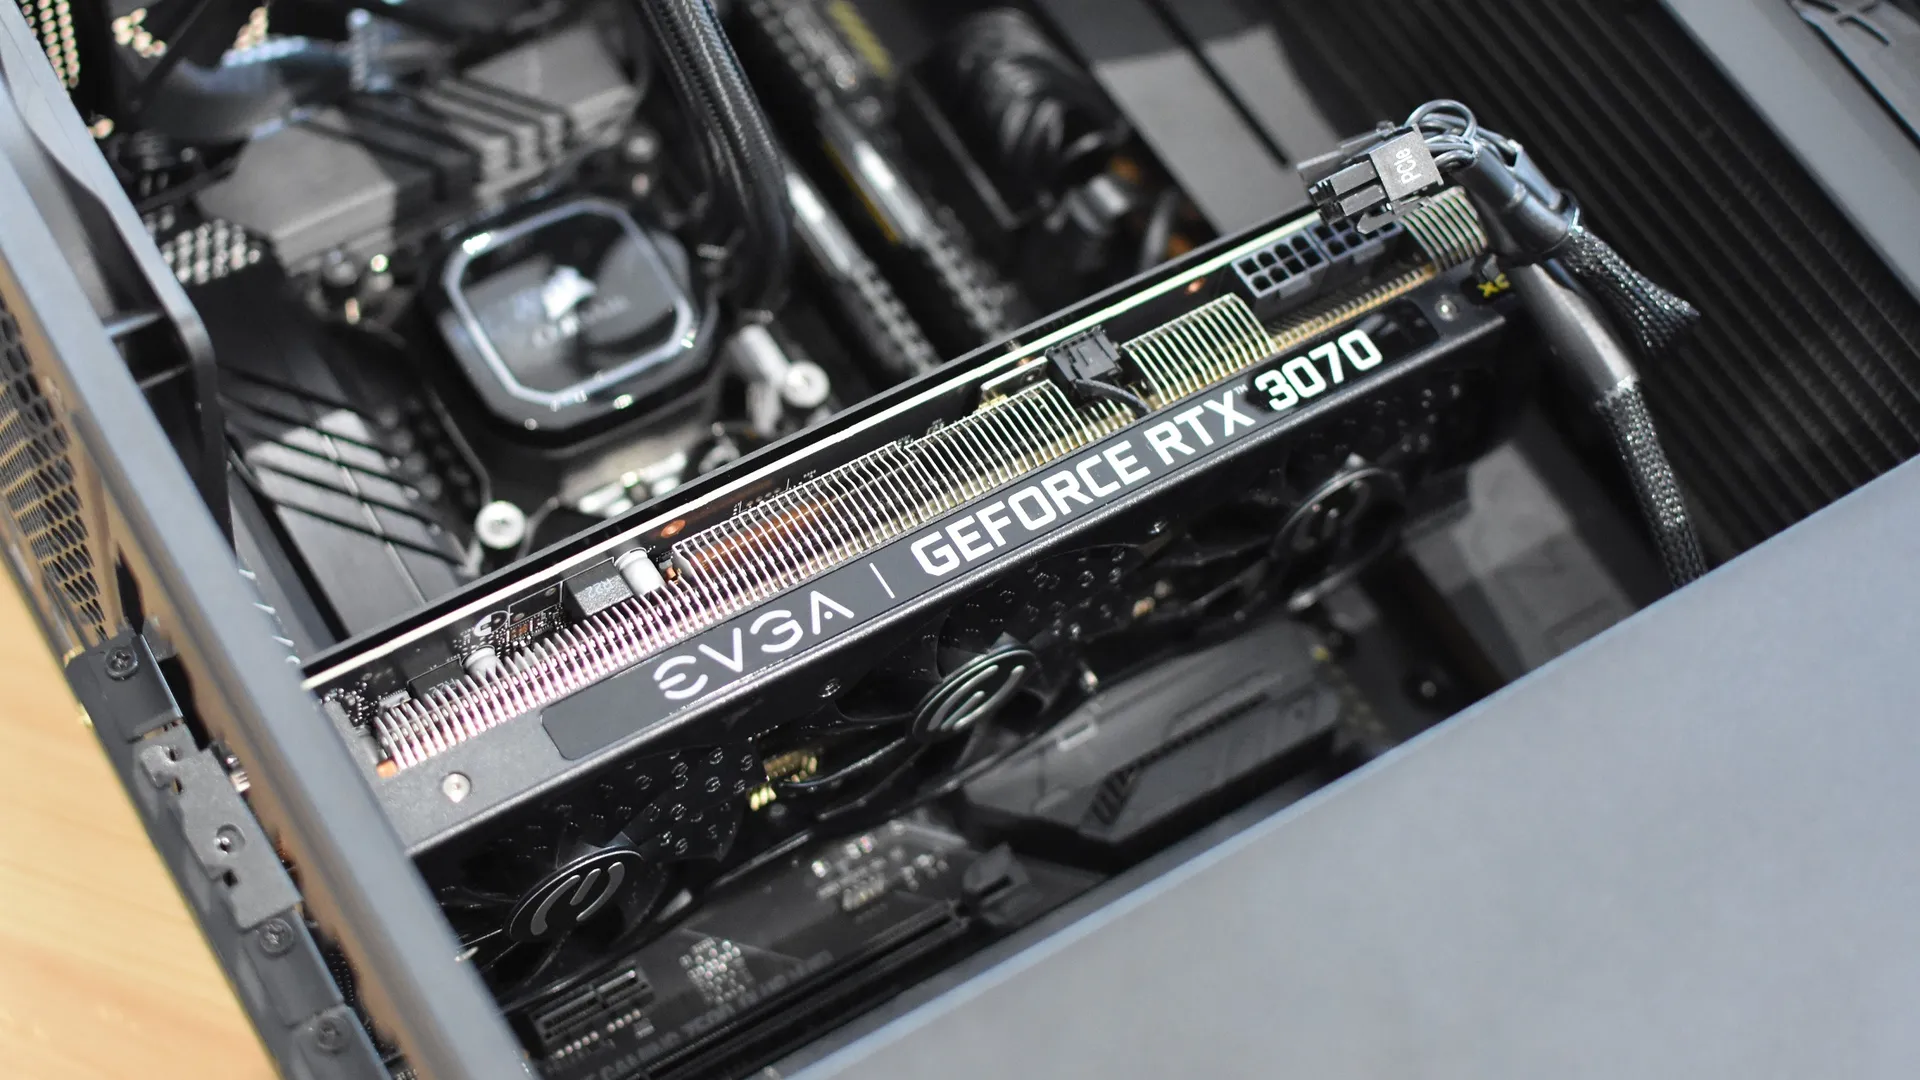
Once the power cable is removed, it’s time to detach the GPU from the motherboard. There is a lever that holds the GPU in place. It’s just like the lever you see on the RAM slot. You need to pull it aside to unlock the card from the PCIe slot on the motherboard.
Assuming the GPU is unscrewed and its lever is unclipped, you can now just pull the whole thing out by sliding it outward.
Putting it back in or putting in a new GPU is the opposite process. Install it into the PCIe slot, snap the lever back on, connect the power cable, screw it back on the outside bracket, and close the case.
3. Installing New Drivers
Once installed, boot your PC. Make sure the monitor cable is connected to the GPU and not the motherboard (both have ports for display and it’s not rare that first-time PC builders incorrectly connect their monitors to the motherboard instead of the GPU). Your PC should boot just fine. If it doesn’t, some BIOS settings might need to be tweaked.
Once your PC is turned on, you will have complete access to your PC just as it was before. Reinstalling a GPU, installing a new one, or even removing the GPU does nothing to your system and its files.
The only off-thing might be the bad resolution as the drivers are not installed. Most probably, Windows will begin installing the basic display drivers for your device right away. You can give it a minute. Open Task Manager and sort by the Network (driver download) or Disk (driver install) columns. Let the process finish, if one is running.
Once done, go to the official website of your manufacturer to find the right drivers. Here are the direct links:
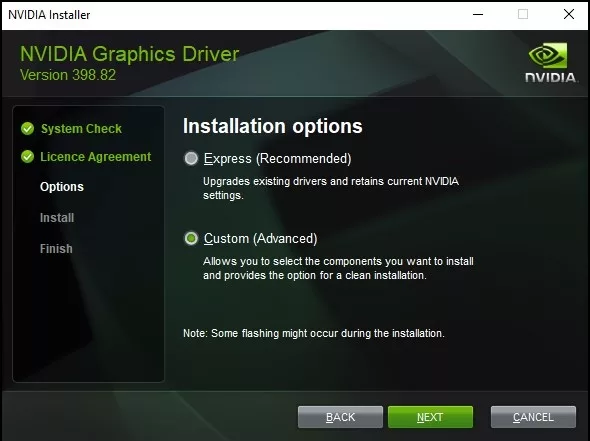
- Nvidia Drivers: Choose your product using the many drop-down menus. Keep Game Ready Driver in the Download Type menu. Click on Search and download the first option. Once downloaded, run it and give it time to install.
- AMD Drivers: Use the product list to find the exact graphics card and click on Submit. Now, click on your Windows version and select the Download button in front of the software name (which should be something like “Adrenalin 24.1.1 (WHQL Recommended). Once downloaded, install it and let it run.
- Intel Drivers: Choose your product line from the list, such as the Intel Arc & Iris Xe Graphics, and click on Download. This will directly start the download. Open it and let it run.
It’s also possible to use auto-detectors to find the most suitable drivers. Nvidia and AMD offer tools for that.
Nvidia GeForce is different from Nvidia Control Panel. You will have a choice to not install the GeForce Experience app when you install your drivers. Seeing how you need to use this app for any future updates, it’s recommended to install it. The icon that shows up as Nvidia Settings in the taskbar or tray is for the Nvidia Control Panel. The GeForce Experience app can be opened by searching for it just like how you’d open any other app on your PC.
4. Post-Installation
Once your drivers are installed, it’s time to restart your PC. The app will demand a restart by itself. Even if it doesn’t, you should do it. Just make sure that there’s no ongoing installation using the Task Manager. The process “Modules Installer” might be operating under the hood, just let it finish on its own.
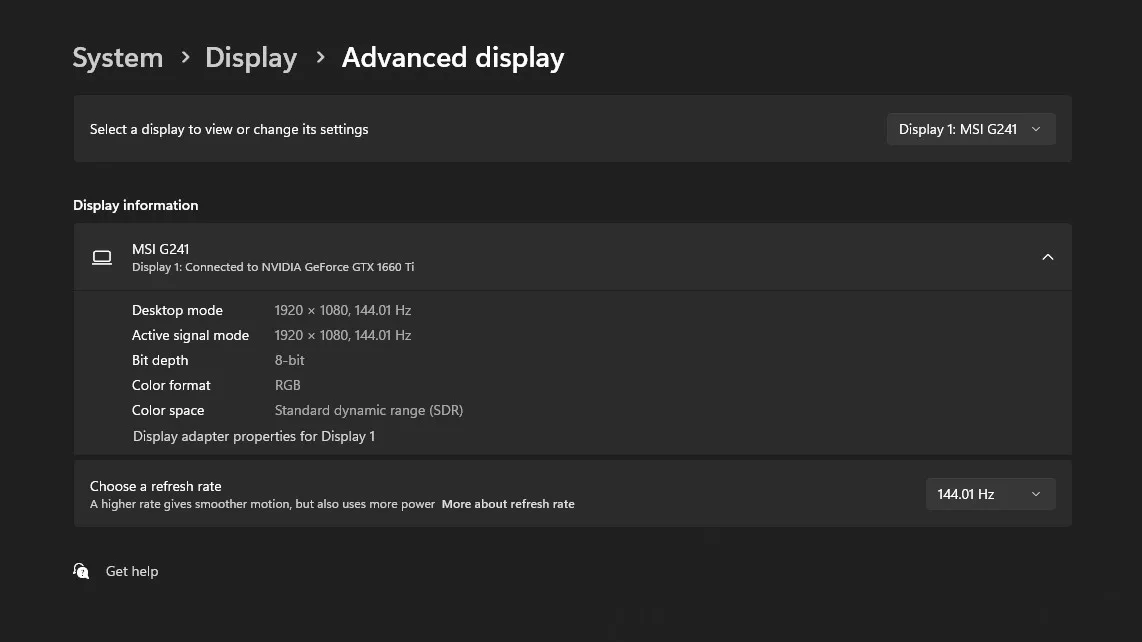
- After restarting the PC, go to your Windows Settings > System > Display > Scroll down to Advanced display > Select the right refresh rate (ideally the maximum supported by your GPU or the monitor, whichever is lower).
- Uninstall DDU from your PC.
- Press the Windows key and type “Disk Cleanup”. Press OK on your C: drive. A new dialog box will open, click on “Clean up system files” here and again press OK on your C: drive. Now, the dialog box will display all unnecessary files, including any unused driver falls or temporary driver packages. Select them all and click OK to delete all this cruft.
- Open Nvidia, AMD, or Intel’s third-party app like GeForce Experience or AMD Software and manually check for driver updates.
Your PC should work just fine now!