So, you want to repaste your GPU because it’s running hotter than normal, giving you thermal throttling, or it’s just been a few years. Let’s first clarify a few things:
- Why repaste? Repasting your GPU helps extend the life of your graphics card and improves its performance.
- Who should repaste? I still see people try to pull out their processor with the cooler on and bend the pins. Please don’t attempt if you don’t know what you’re doing. It’s not recommended for beginners at all.
- When to repaste? When a GPU is pasted at the factory with a high-quality thermal paste, it’s supposed to last for years. But if your temperatures are going unbearably higher than average, it’s time to repaste. Note that once you repaste, you will need to continue repasting every year, though it’s better to do it every six months or so, especially if you play taxing games or keep your card overclocked.
Now, it’s possible that you don’t know what the thermal paste is or what it does. Knowing this stuff is important before you turn off your PC with a mind to take the graphics card out. Next, let’s get that out of the way.
What’s the Thermal Paste?
It’s a paste that conducts heat, put between the chip and the heatsink. The heatsink absorbs heat from a hot GPU but it’s not 100% efficient as both surfaces are not in perfect contact (even metal that appears flat to the naked eye has many deformities and cavities). Putting this paste between the two parts makes the heat flow much better. The paste allows a larger part of the heat from the GPU or the CPU’s integrated heat spreader (IHS), the flat surface, to transfer to the heatsink, which then uses fans to blow it all out so you can play your games without much trouble.
This paste dries over time and might even form cracks. When it does, it doesn’t conduct heat as well as it used to do. Over a very long time, this dried-up paste can make the GPU overheat and operate at a temperature that’s higher than average for that model. This, in turn, can lead to thermal throttling (FPS drops) or even damage.
The fix? Pull the heatsink off the GPU (or the CPU, as you can also repaste the CPU), clean out the dried paste, squeeze fresh thermal paste, and put everything back together in. This is called repasting.
How to Repaste Your GPU?
Fair warning—Repasting your GPU requires a lot of patience and even more care. It also requires a tube of new thermal paste (the fancier term is thermal compound), a microfiber cloth or paper towel, and a screwdriver. Get a little more thermal paste and be prepared to waste a little in bad attempts.
Now, we need a cleaner.
Get yourself some isopropyl alcohol or ethanol to completely remove the dried-up paste from before. If you can’t get either of these, try acetone (don’t apply it on any plastic) or distilled water (pay special care to dry it off). You might also just run the PC for a while, let everything heat up, and then do the process—This makes cleaning the paste easier with just a piece of cloth. If none of this is feasible, as a last resort, carefully use any kind of rubbing alcohol you can get at a local pharmacy.
Now, follow these steps:
1. Remove the Card
Turn your PC off. Disconnect the power and unplug the computer. Press and hold the power button for 10 seconds to fully discharge the circuits. Now, open your chassis and locate the graphics card. Disconnect the cable. Unscrew the card from the outside. Unsnap it from the slot. Carefully take it out of the chassis.
2. Remove the Heatsink
Once the card is out of the PC, put it on a soft, flat surface with the fans or shroud facing down and the metal plate facing up. You might want to consult with the manual if you’re not 100% sure about all the screw locations. Unscrew all screws. Now, flip the whole thing over so that the fans are facing up. Before you lift the whole thing off the card, check if there are any connectors between the shroud and the GPU, and disconnect them. Remove the shroud, which will have the fans on the outside and the heatsink pipes on the inside, and put it aside.
3. Clean Old Paste
Dried white or light gray thermal paste will be visible on the “chip,” which is the actual GPU, the square in the center. Some residue will also be present on the heatsink side. Take some isopropyl alcohol on a piece of microfiber cloth or paper towel. Be gentle and super careful.
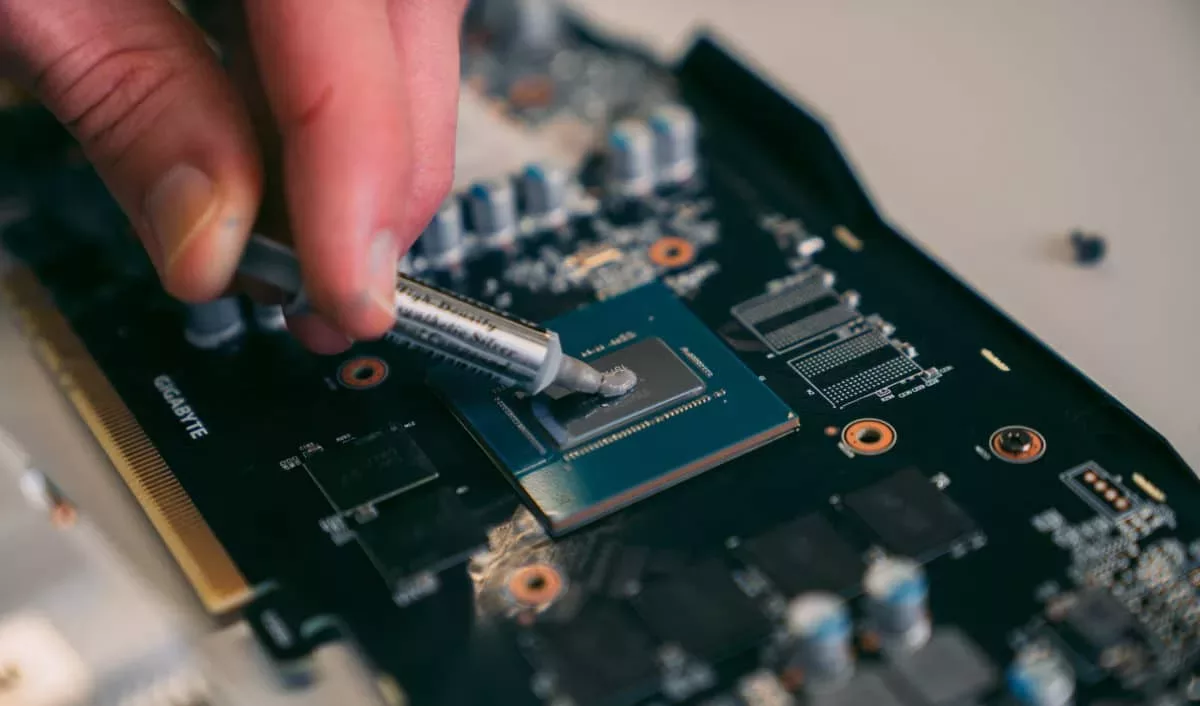
4. Apply New Thermal Paste
The most efficient way to apply thermal paste is to take a rice grain sized drop of thermal paste and put it in the middle of the chip. Do not spread it. When you reattach the heatsink and screw it down, the pressure will make it cover the entirety of the chip, pretty much. Put too little and it won’t cover it fully, and put too much and it will overflow. The application of thermal paste is an art. It’s okay if you don’t get it right the first time. Wipe it off clean and try again.
5. Reattach the Heatsink
Perfectly align the heatsink with the card and press it down firmly. Ensure that there’s no space or air pocket between the two surfaces. Screw it back in place.
And that’s it. You’ve repasted your GPU. Now, reseat the card in the PCIe slot, secure it with the screw and snap, reconnect the cable and display, and turn on your PC to see how it functions. Check the average temperature now and it should be lower than before. May your temps be low and frames high.