The immersion of video games is fully enjoyed with gaming headsets. But sometimes, connecting a gaming headset to a PC can create its own set of problems. These problems range from driver incompatibility to the PC’s webcam hijacking the mic rather than allowing the headset to use its own.
We’ve prepared a sort of to-do checklist to troubleshoot gaming headset problems for smooth sailing. Get ready for a step up in your gaming experience! Let’s see how to connect a gaming headset to your PC.
Make sure that your ports are working
Even the best gaming PCs can lack in one thing: port quality. I’ve seen it happen many times now. Audio ports, USB ports, etc. running out of life one by one. If you have multiple ports and especially if your PC is more than a couple of years old, it’s important to know which ports are working well.
You can test it by plugging in any device and testing the sound from them. If they don’t work, you should get a panel replacement for the ports.
On desktop PCs, the ports are usually on the back panel, and on laptops, they’re usually on the sides.
There are three types of audio ports that gaming headsets use. Let’s see what are they and how they work so you can better understand how to connect a gaming headset to your PC.
3.5mm ports
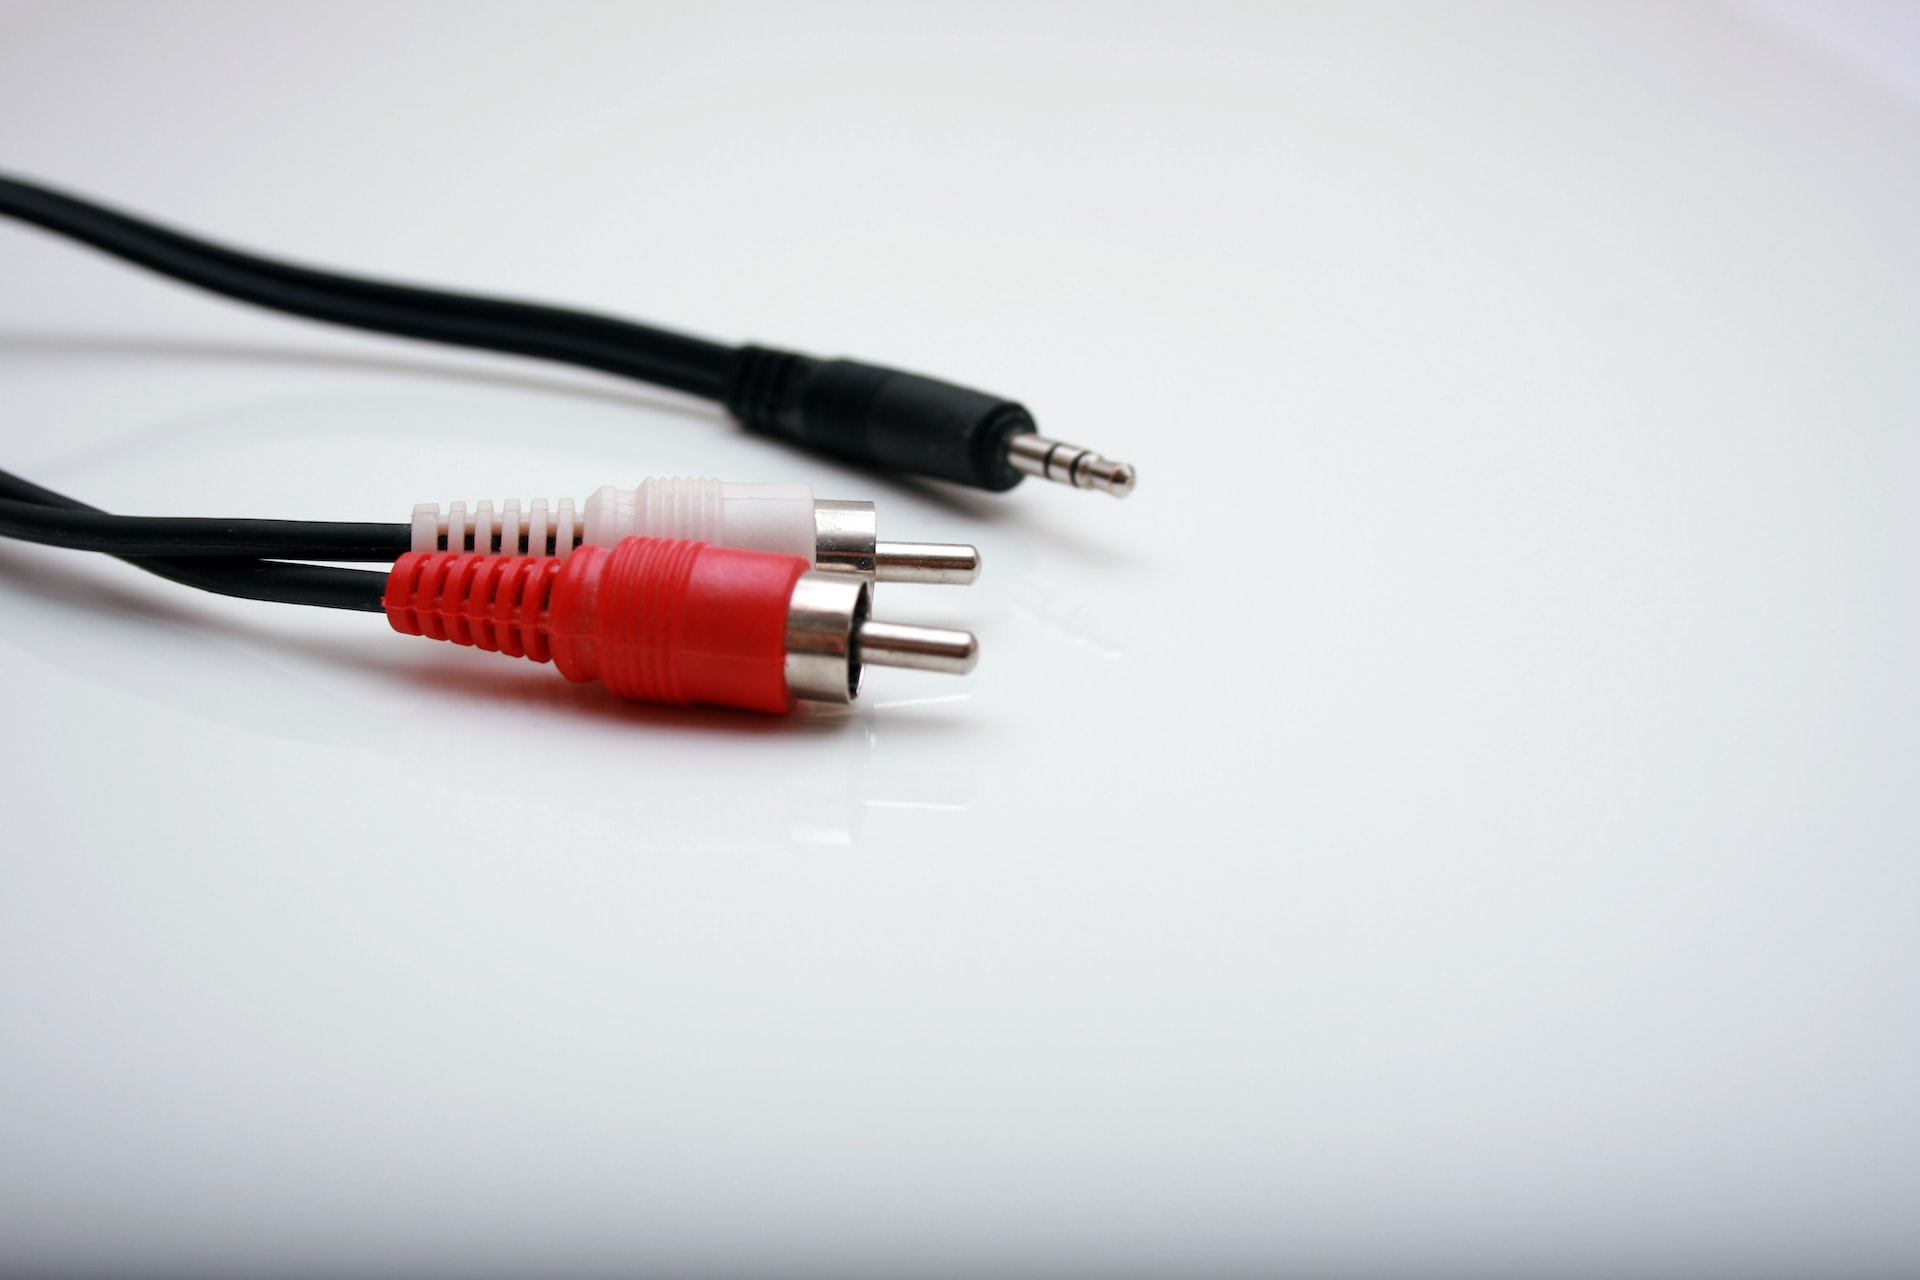
Desktops have three 3.5mm ports side by side on their back panel. Laptops have only one. On desktop PCs, you need to plug in “audio-out” and “mic-in” cables into the respective 3.5mm ports. This applies to you if your headset comes with a two- or three-pin 3.5mm jack.
The audio-out port is responsible for sending the output to the headphones. You will plug your headset’s respective cable into it. The mic-in takes microphone input, and you’ll plug in the mic cable from your headset into it.
Once both (and the third too, if your headset has it) are plugged in, play music and attempt recording your voice using a voice recording app (pre-installed on any Windows PC, or you can also do a Google or Cortana voice search).
Gaming headsets that have 3.5mm jacks need to connect to at least two audio ports to work both ways (input and output).
Note that many non-gaming headsets only have one port even if they have a mic. These are meant to be used with laptops or phones. These mics won’t work with a desktop PC, as a desktop PC requires a dedicated mic-in jack.
It’s easy to see which cable goes into which port. There are color codes on both, the headset’s jack and the CPU’s panel. If not, there is iconography and also text to help you correctly plug them in.
USB ports
Many gaming headsets use USB 3.0 (older ones can have USB 2.0) ports. PCs from before 2008 have no USB 3.0 ports as the standard was developed after their time. USB 3.0 ports are more power-efficient and faster than 2.0, though USB 3.0 headsets can be connected via 2.0 ports as well.
Female USB 3.0 ports have blue plastic which differs from the black that 2.0 ones have (and white that the USB 1.0 ones have).
A USB connection throws the need for three different channels (mic-in, audio-out, audio-in) out of the window. The headset can both send the microphone input and receive the output to and from the port using the same connection.
That’s why USB gaming headsets are the norm now.
If you have a USB gaming headset, plug it into any USB 3.0 port and you’ll be good to go. Which port you plug it in doesn’t matter.
HDMI ports
HDMI is predominantly a display connection, but HDMI cables do carry audio signals. For example, you’ll find many gaming monitors equipped with 3.5mm or USB ports on their back panels.
Once the monitor is connected to the CPU with an HDMI cable, it can capture the audio information from it, which can then be relayed to a headphone connected to the monitor, without having to connect it to the CPU itself.
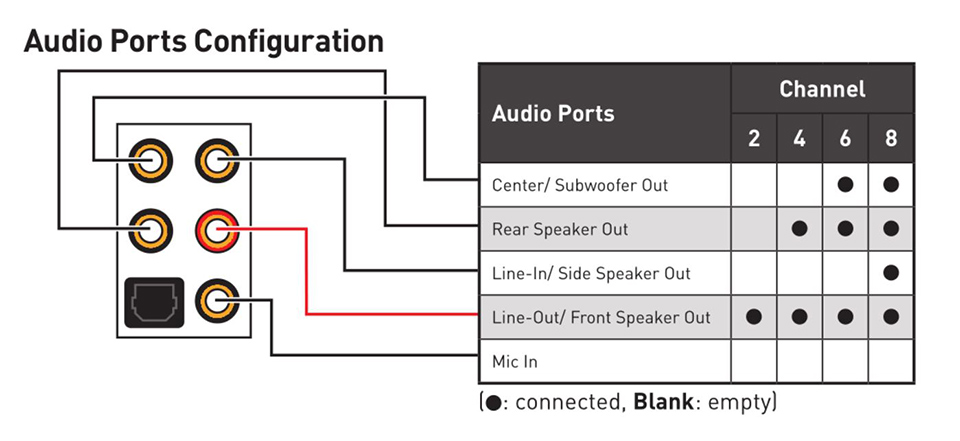
Some gaming headsets come with HDMI cables. These not only allow them to transmit audio but do so across eight channels.
What port does your gaming headset use?
But ultimately, how to connect a gaming headset to your PC? First and foremost, check what type of cable your headset uses. If it’s USB or 3.5mm, you’re in luck as most gaming PC cases and laptops come with those ports. HDMI is not that omnipresent either. But don’t sweat, you can always go for an adapter.
Adapters
If you have USB ports free, go with an HDMI (female) to USB 3.0 (male) adapter. This adapter will take in your headset’s HDMI cable and connect to any USB 3.0 port on your PC. HDMI to 3.5mm adapters are also available. But please note that in the case of desktop PCs, you don’t want any HDMI to 3.5mm adapter. You specifically want a 3.5mm splitter instead. A splitter will receive HDMI input on one end and have three output jacks on the other, to plug into the respective 3.5mm ports on the panel.
Plug the headset in
Once that’s out of the way, you’re ready to plug your gaming headset in. Match the right ports in the case of 3.5mm jacks or you will either not get audio or your mic won’t work. Equipment damage is also possible, though rare.
Next up on the list is configuring the sound output on the PC. After the connection is made, the sound levels need testing. More often than not, this configuration will be automatic and, in all likelihood, all you need to do is sit back and relax once the headset is plugged in.
In case no sound is coming to your headset, there’s some troubleshooting to be done.
Windows PCs support multiple audio devices, so click on the sound icon in the taskbar and make sure the right device is selected. It’s common for Windows to not accept a device as the default one and keep the older device active. Selecting the right device and adjusting the sound level bar will give you an auditory notification of whether the headset is working.
If no sound is playing on the headset still:
- Right-click the sound icon in the taskbar.
- Open Sound Settings.
- Sound Control Panel.
- From this list, see whether your gaming headset is listed and make sure it has a green check mark next to it.
For further troubleshooting, click its Properties and go to the Advanced tab in the window that opens up. You can manually adjust various settings here, so find and fix any problems here.
Hello mic testing 1…2…3
Testing the mic is important to have the best gaming experience and communicate in-game with your fellow players.
Again, most headsets will automatically set up the microphone if all goes well and the cables are all connected properly. If the headset’s mic isn’t working, here’s a short checklist:
- Right-click the sound icon in the taskbar.
- Open Sound Settings.
- Sound Control Panel.
- Go to the “Recording” tab and choose the right microphone/headset.
- Choose “Set as default”.
- Click on Properties (make sure there’s a green check mark).
- Go to the Levels tab where you’ll be able to adjust the input volume as per your needs.
Testing the mic is easier than it looks. Open any search engine that accepts voice search (Google, YouTube, Bing) and speak into it. Alternatively, Cortana also accepts voice searches. Or you can also use the Voice Recorder app that comes built-in.
If it doesn’t work, check the headset’s documentation for any specific steps that you might need to take. Double-check whether you have the best drivers installed. Doesn’t hurt to also go on the manufacturer’s website and download a fresh copy of your headset’s drivers to install them.
Also, note that many games have in-game settings for microphone input. In case your previous device or speaker didn’t accept mic input and some settings were in place in accordance with that, you’ll need to change them. Games that have said in-game settings will also allow you to adjust mic input levels so you don’t bombard your co-players with all the background noise. Adjust the threshold so that only your speech gets through, while the rest of the low-frequency noise is automatically disregarded.
In conclusion
Here’s a quick troubleshooting list to go through if you’re experiencing issues connecting your gaming headset to your PC.
- Try connecting to a different device or reconnecting to your previous one to find the culprit. If the older/other device works, then it’s the headset; otherwise, it’s the PC.
- Sometimes, a reboot can solve many issues especially if you’ve installed new software or adjusted some settings after plugging in a new gaming headset.
- Make sure your drivers are up to date. Install the compatible drivers from the manufacturer’s website.
- Headsets can also be muted from their controls or the Windows sound interface.
- If it’s a battery-powered/wireless headphone, make sure it’s on and charged.